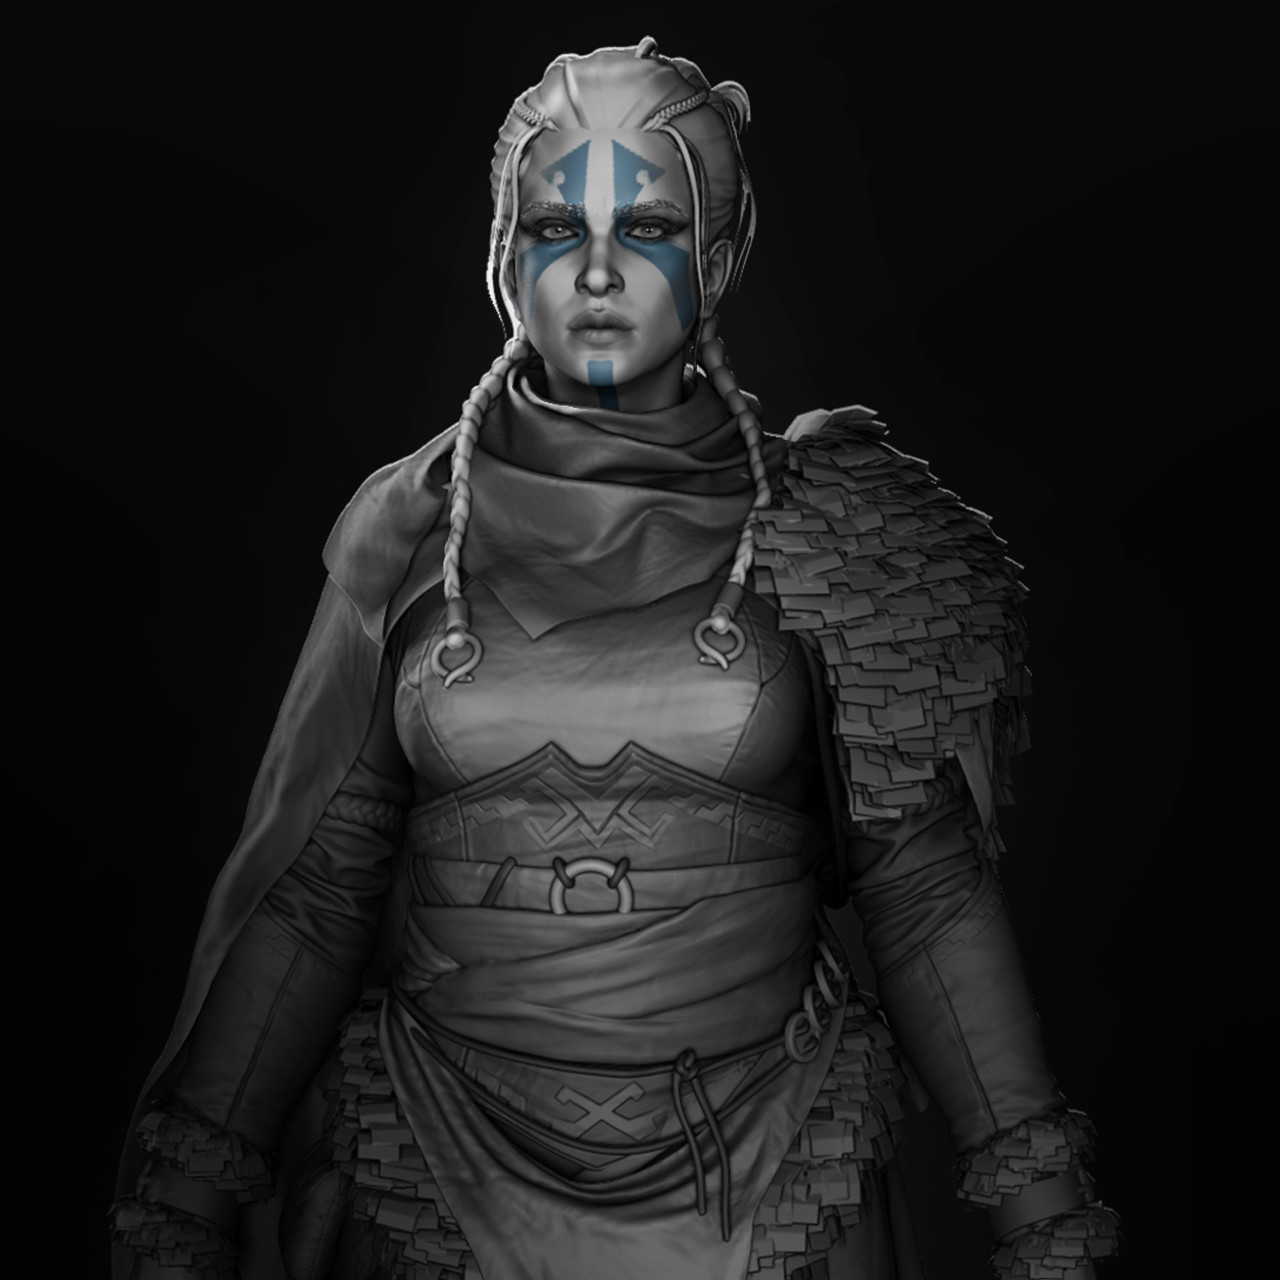
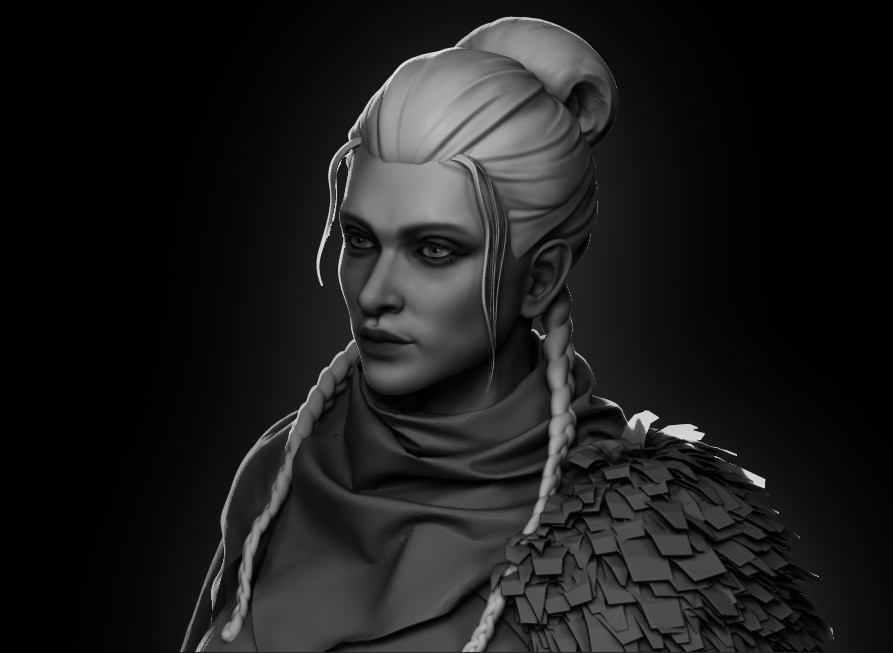
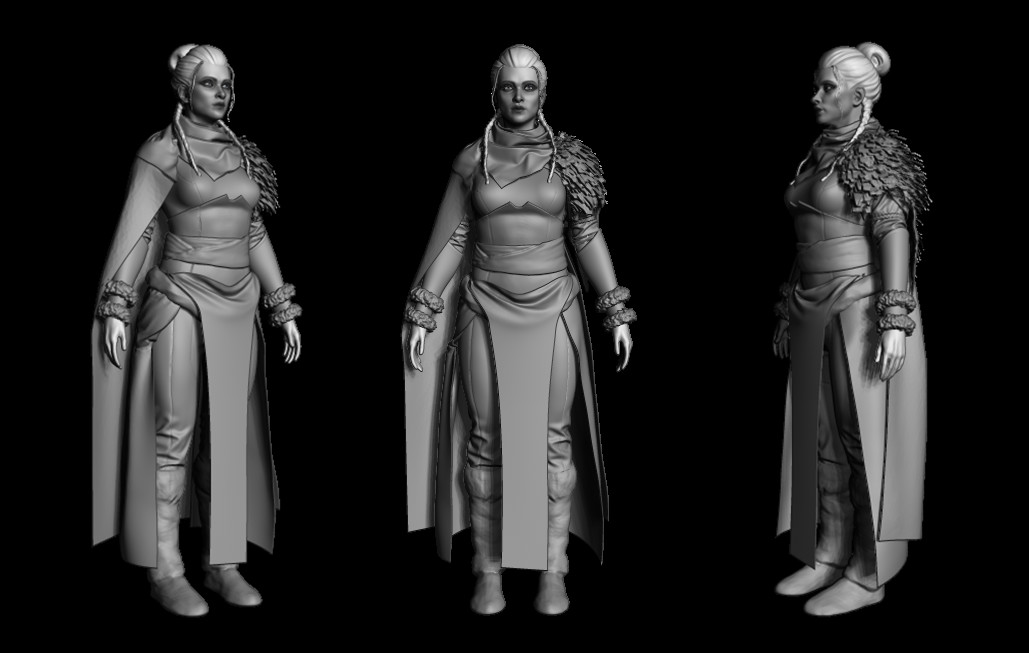
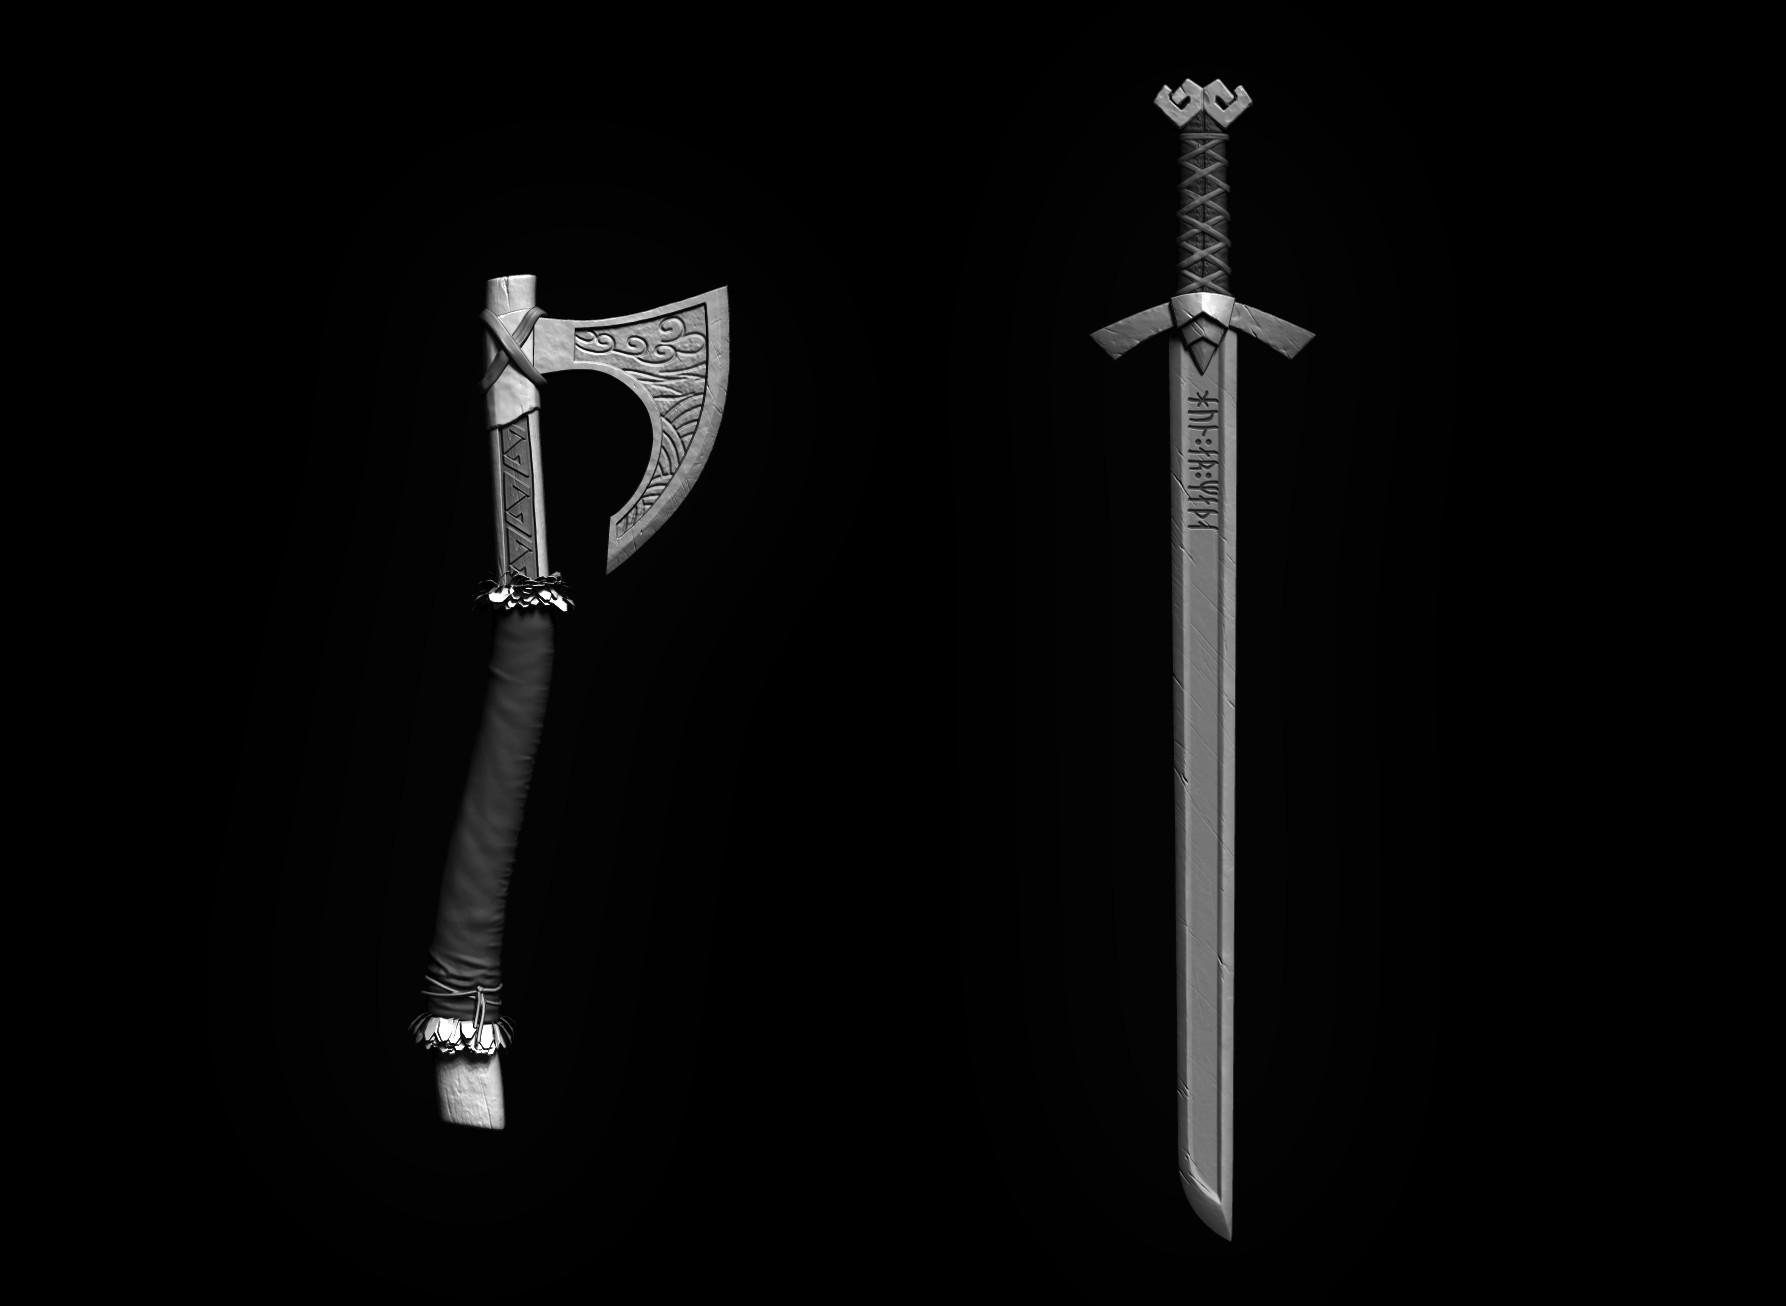
While continuing with rough detailing of the props, I’m exploring the balance between them and trying to maintain a strong silhouette. I might test them together with all the other assets to see if any proportions need slight adjustments. For now, I’ll leave them as they are and move on to developing the character further.
Report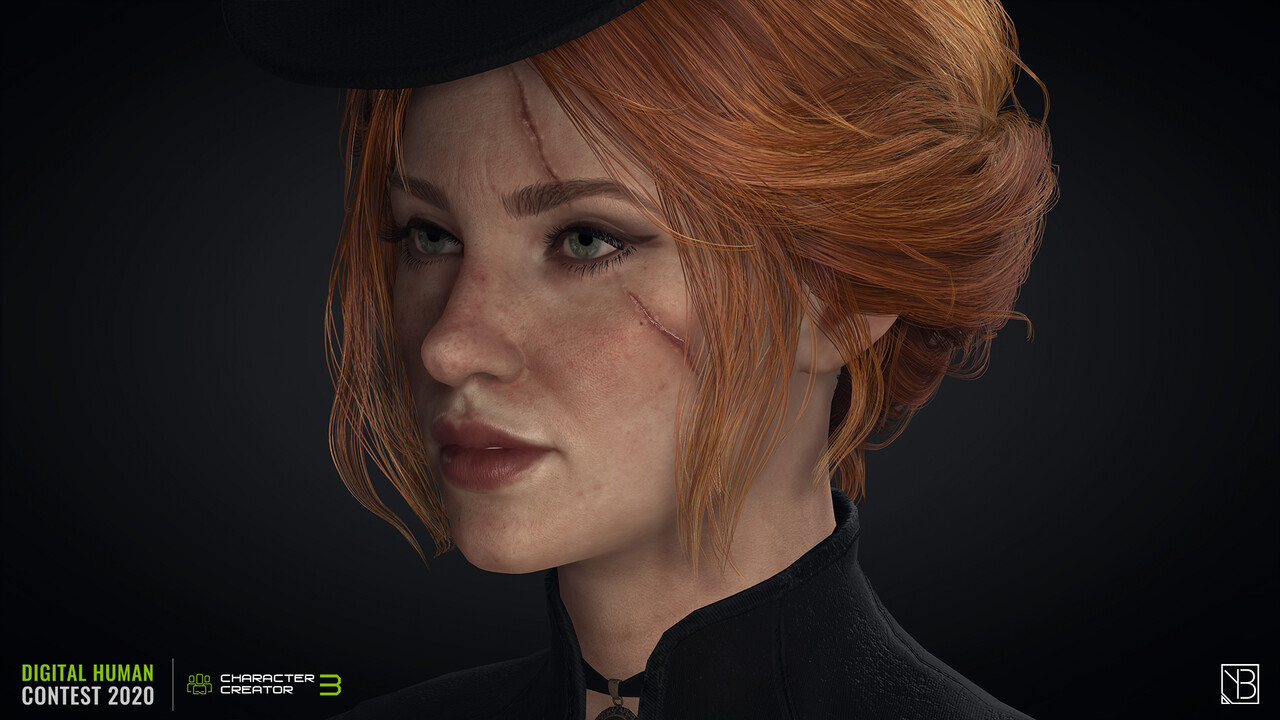


 Report
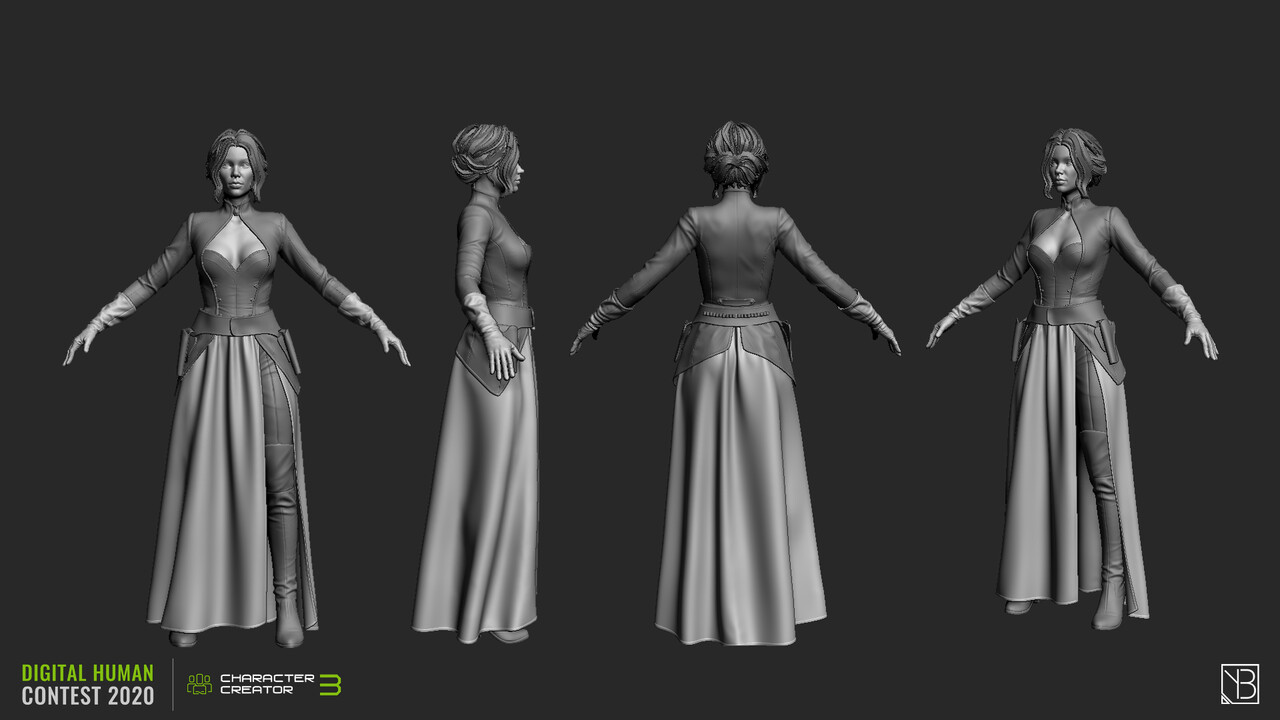

Report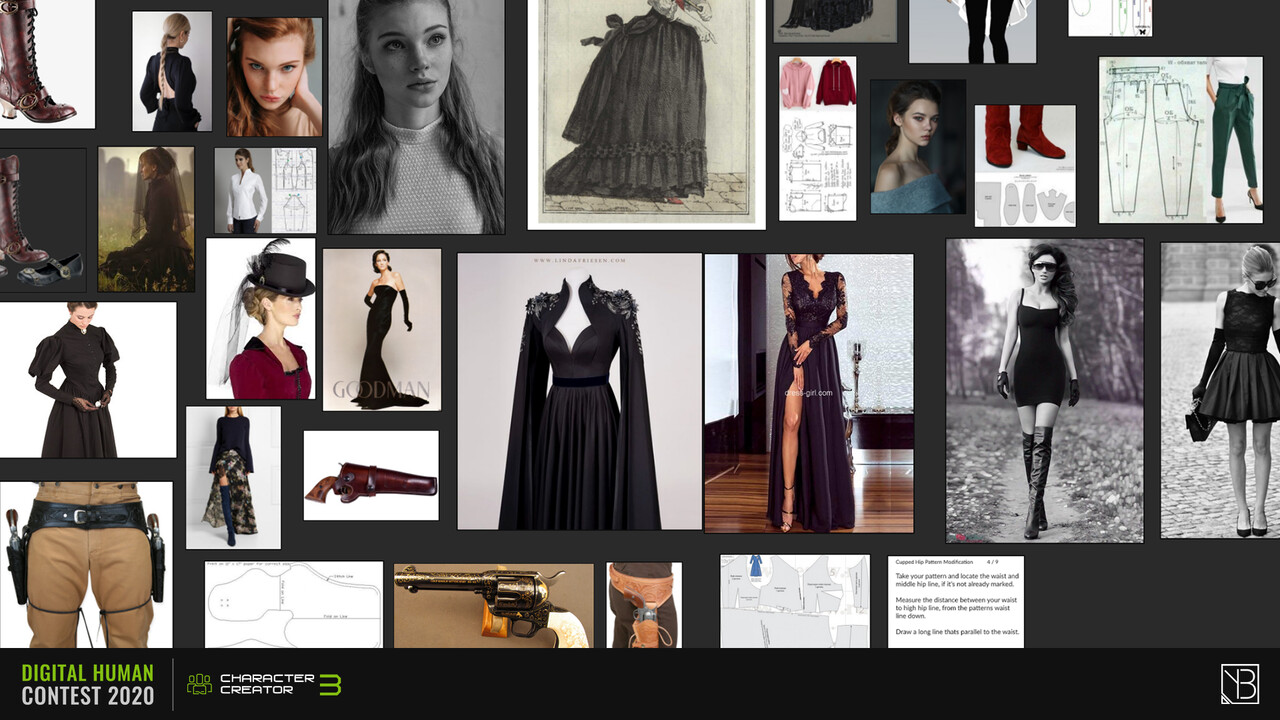 ReportReport
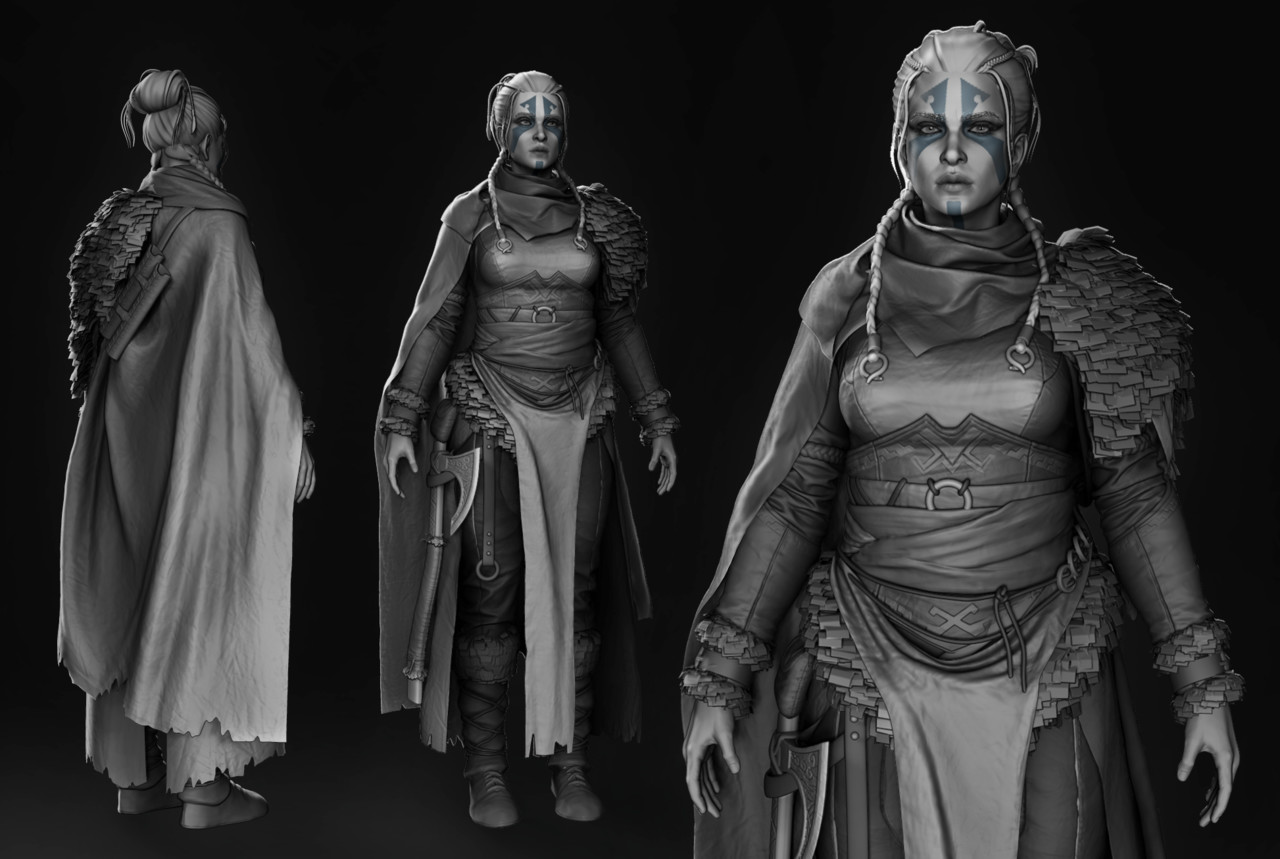

 Report

2020 CC Digital Human Contest - Yumi Batgerel - Black Arachne
Work In Progress / 07 November 2020
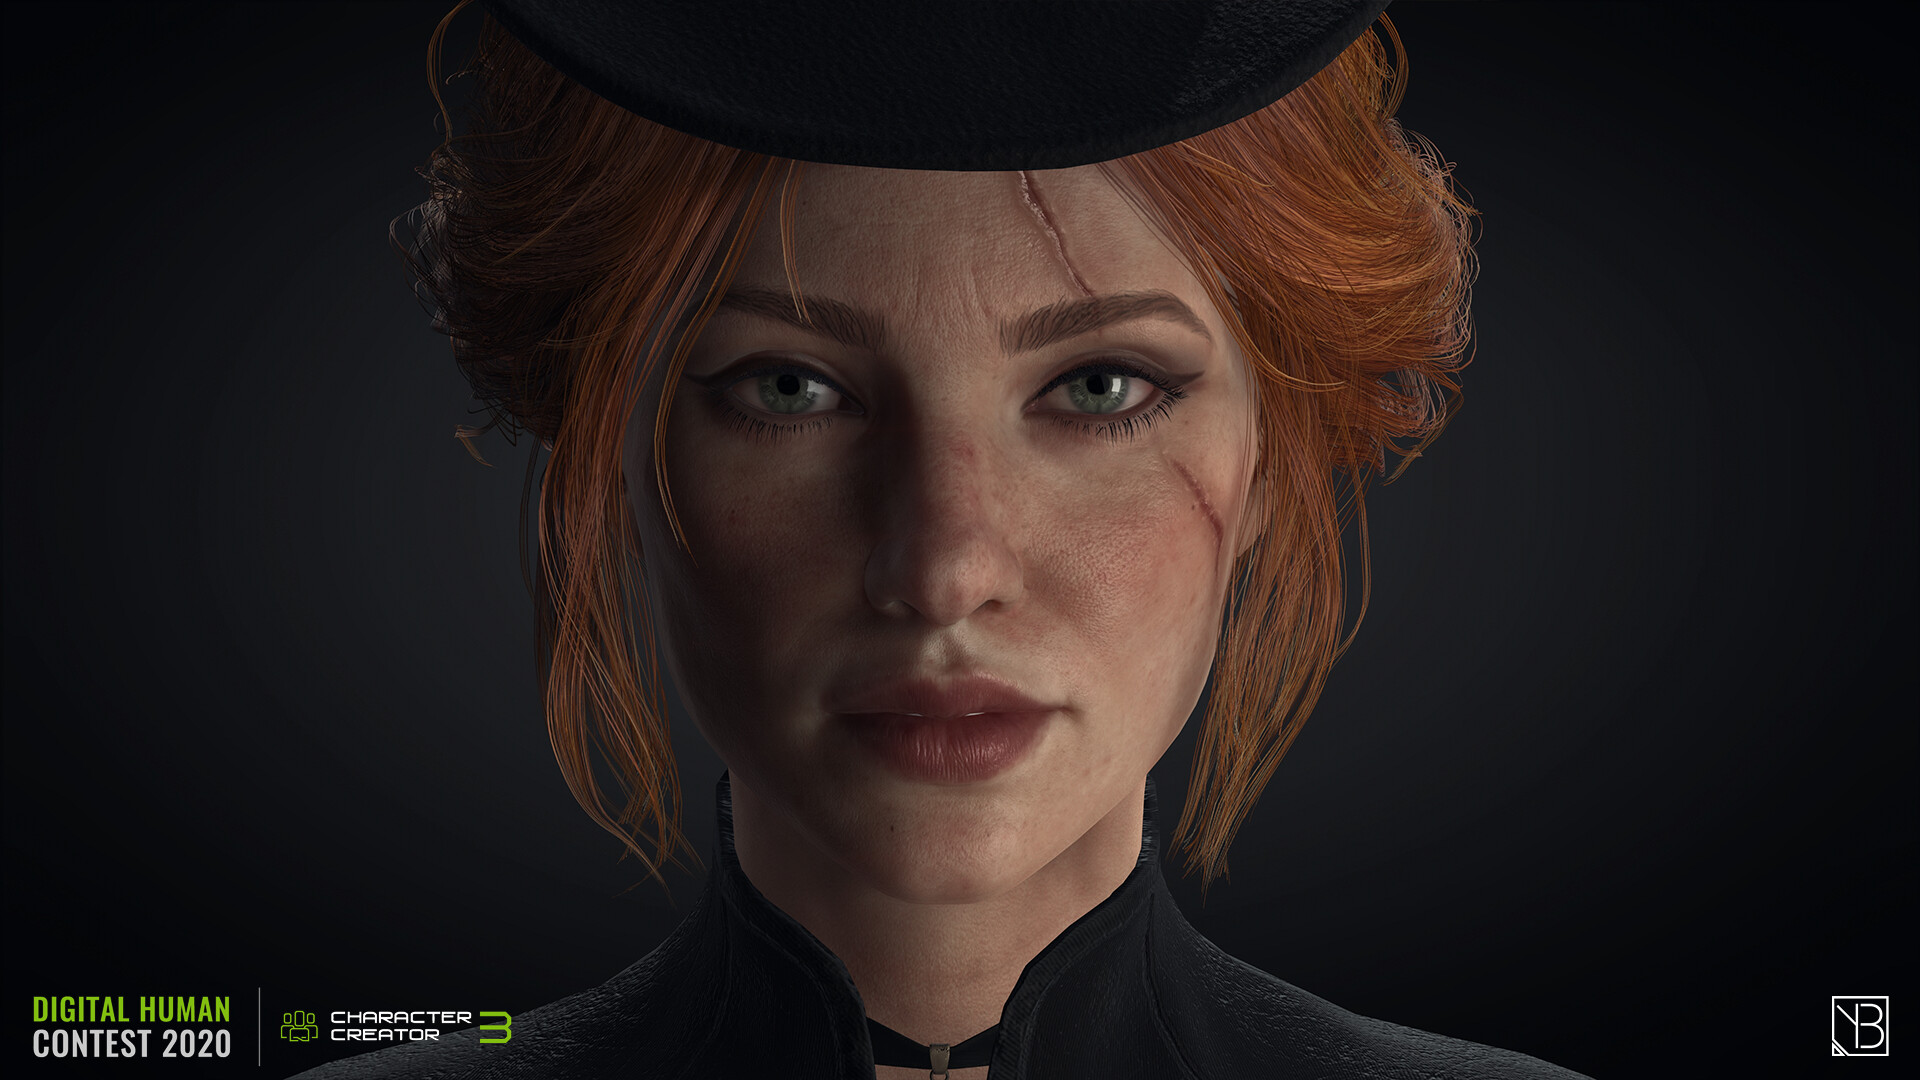
This is my final blog post for this contest. Overall, I've been busy with polishing the textures, skin and hair style and shaders. The project could go in many different directions but I decided to keep it as simple as possible, for the sake of learning. I try to break down what I did to finish the last part of the project. You can check out the final presentation on my portfolio section.

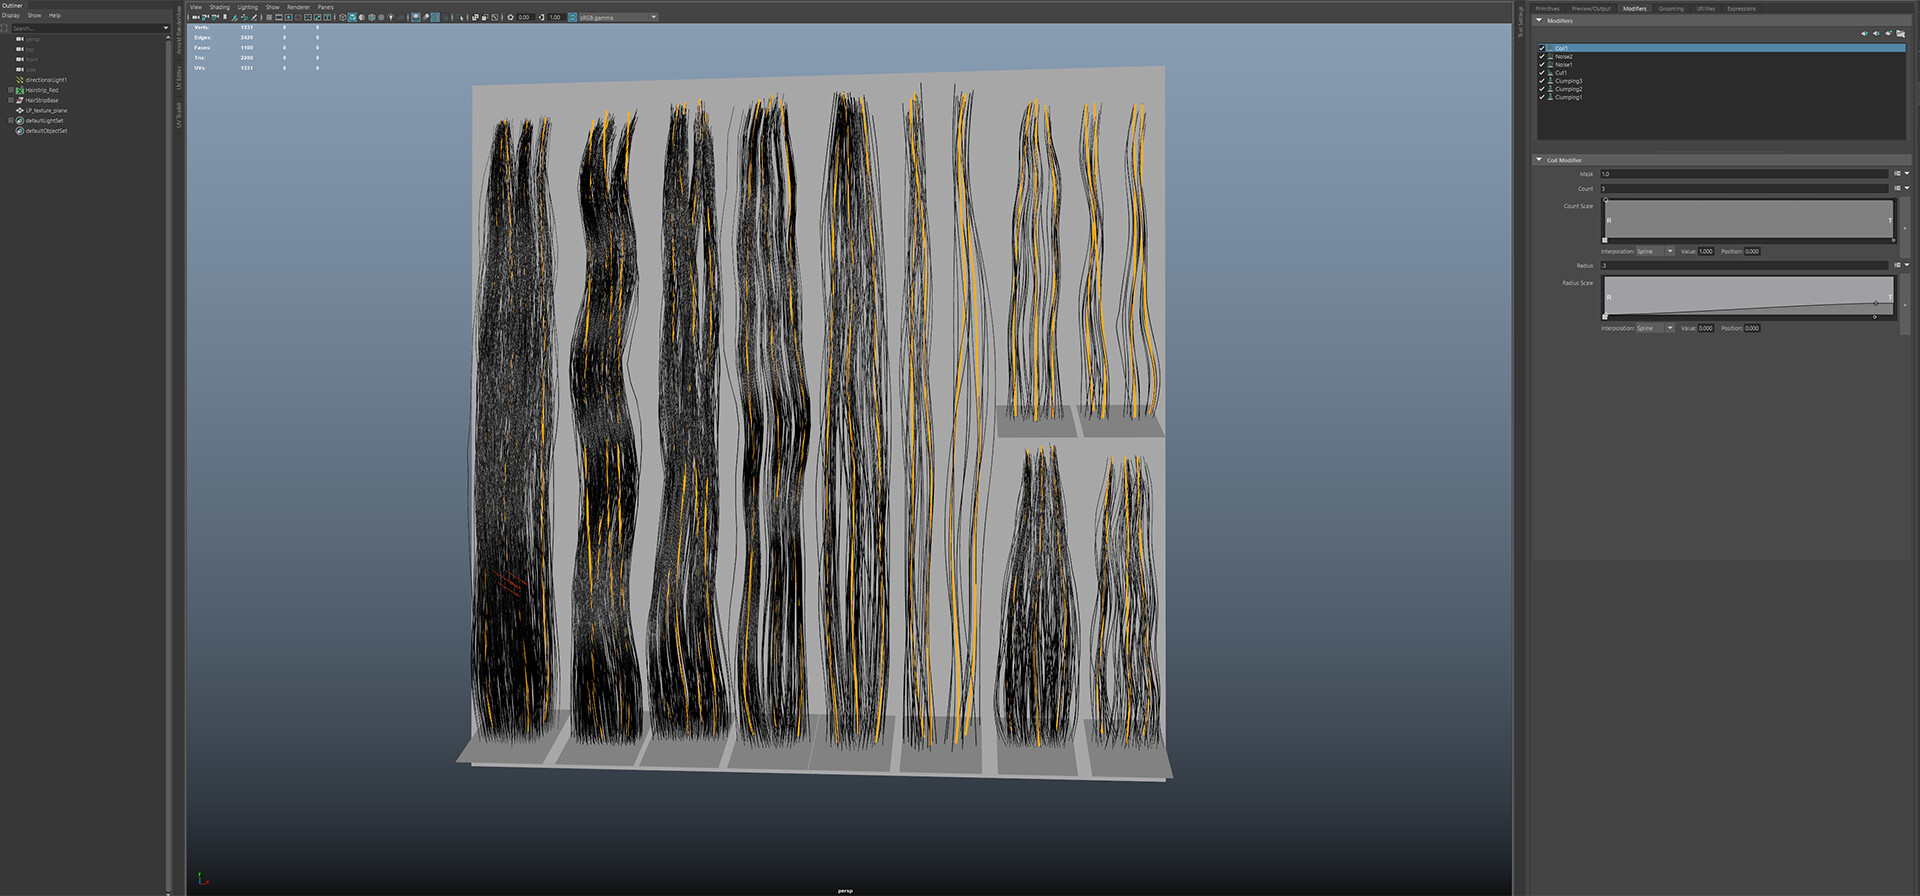
Hair creation
To create the hair strand textures, I'm using xGen in Maya and baking everything out in xNormal. Here is the example of a more detailed workflow I always try to follow video link.
Hairstyle
Usually, I create a pack of hair chunks and use the Nonlinear Deform tools - on the section Deform. However, this time I've tried a slightly different workflow. Instead of using these shape deformers, I've used a plugin called GS CurveTools
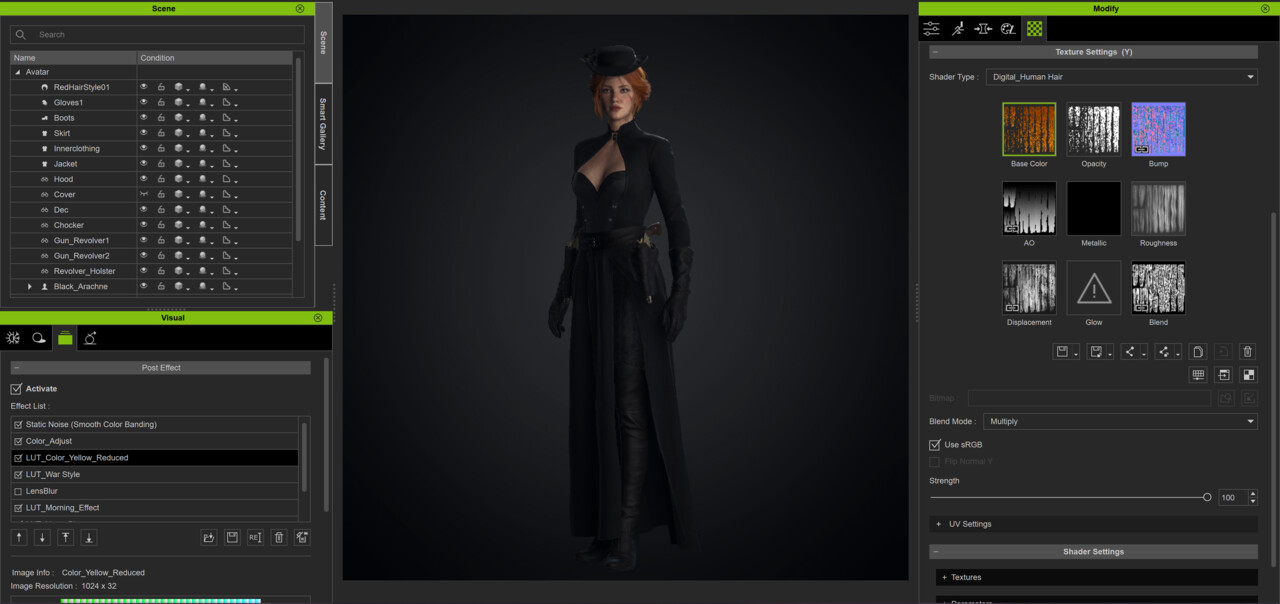
Character Creation 3
You can choose a Hair shader in CC3, import your textures and tweak the parameters.
For the lighting, I used a contrasty atmosphere that I found in the Content-Environment section, which imports already setup lighting as well. I slightly tweaked that until I was satisfied, turned on the GI setting on the Visual Tab and added some Post Effects to emphasis the overall mood.

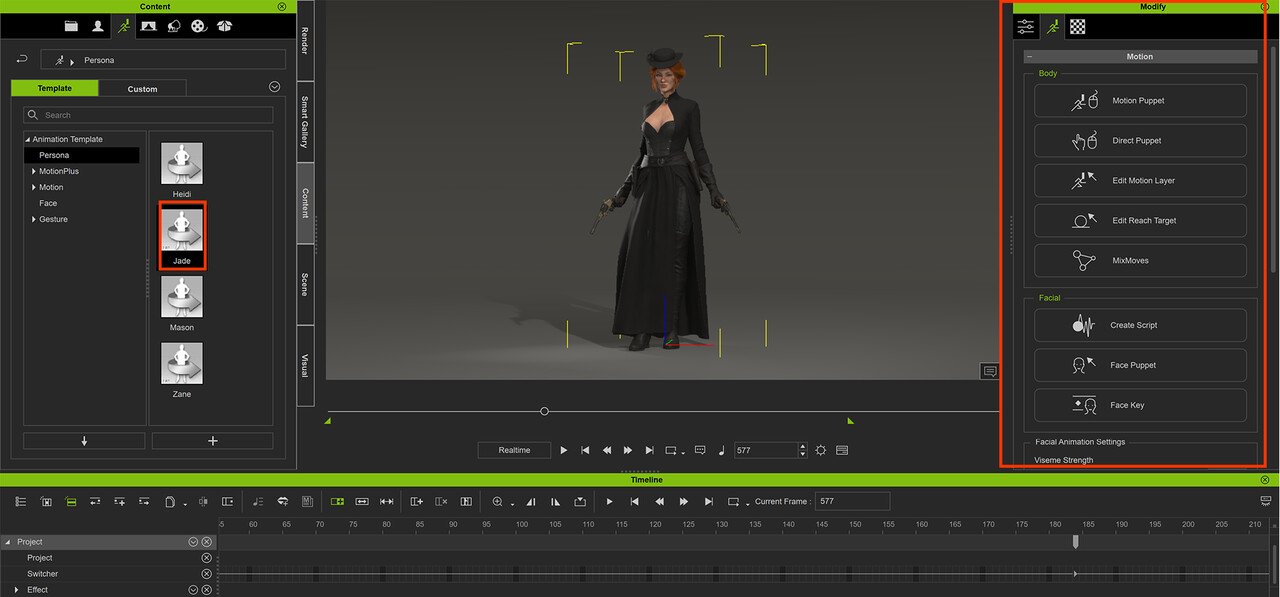
iClone Turntable and Animation
I've been very lucky to find out that iClone has a female Animation Persona with dual guns that is free to use. Overall, I tried and used standard presets I found in the library with little bit of adjustment. Adding facial expression or adjusting the body animation can be done easily by checking through the Motion tab.
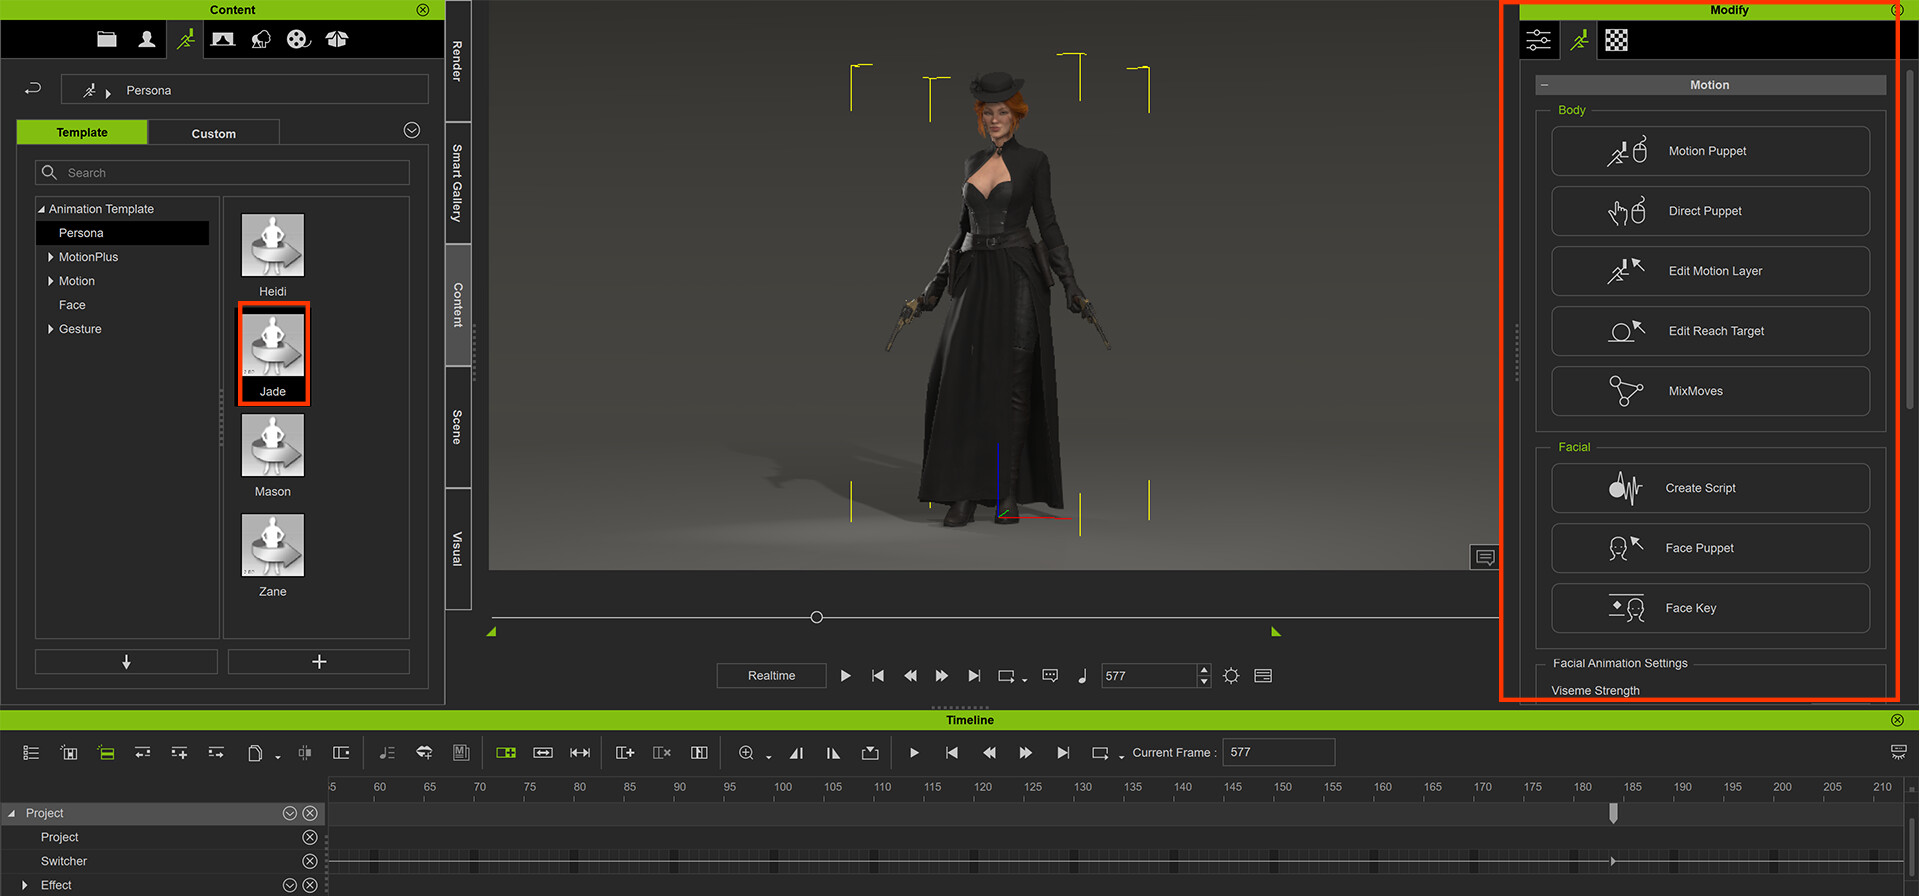
Also, I've created multiple cameras and switched them by using the Switcher section on the timeline, you can find more detailed explanation on this tutorial from Reallusion. This way I was able to work on the short turntable animation by using just one project file.

Turntable preview
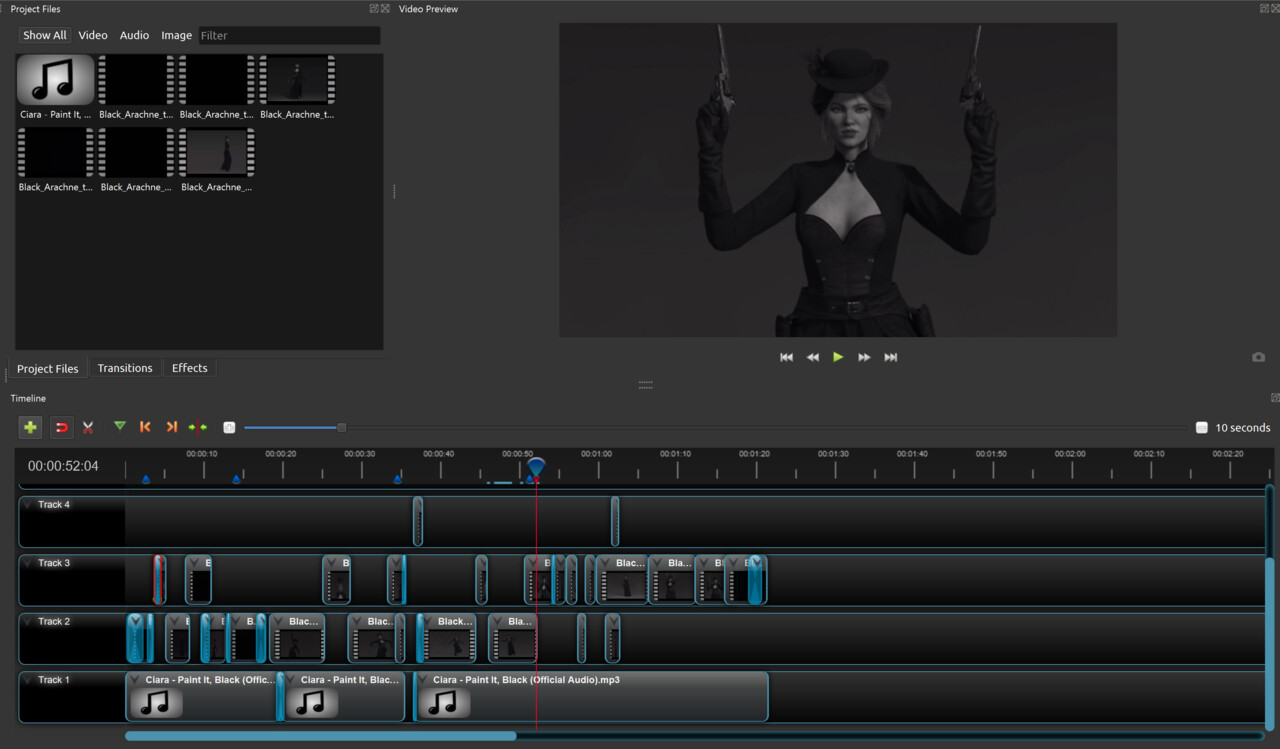
For the second animation, I decided to create two additional separated project files. The first one, where I created just a dancing animation scene and the second one, where she fires her guns. Final editing was created by using OpenShot video editor.
Gunfire
Dance
Openshot

2020 CC Digital Human Contest - Black Arachne - wip02
Work In Progress / 15 October 2020
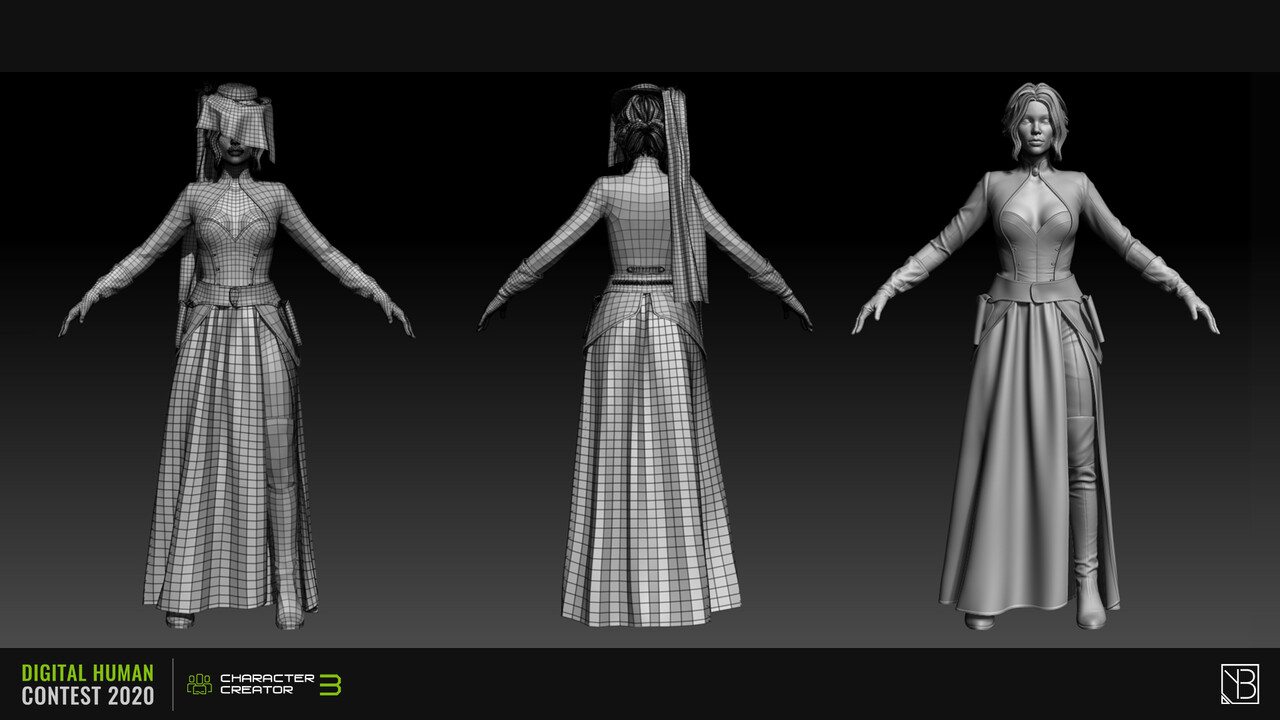
Before I start with adding more details and changes, I wanted to play around with Character Creator and iClone to test out how everything is working. Amazing to see how easy it is to get from this very early stage, already to the lookdev and enjoy pretty much an unbreakable back-and-forth method. Just by couple mouse clicks, everything is automatically imported into the Character Creator scene and it works the same if you want to import your stuff back to Zbrush. Also, automatic weight painting works very nice and easy. However, it doesn't work well with very long dresses or skirts. I think it won't be a huge problem to fix the weights if the skirt was up to the knee height, but in my case, I should probably weight paint my skirt manually in Maya.


Important things to note:
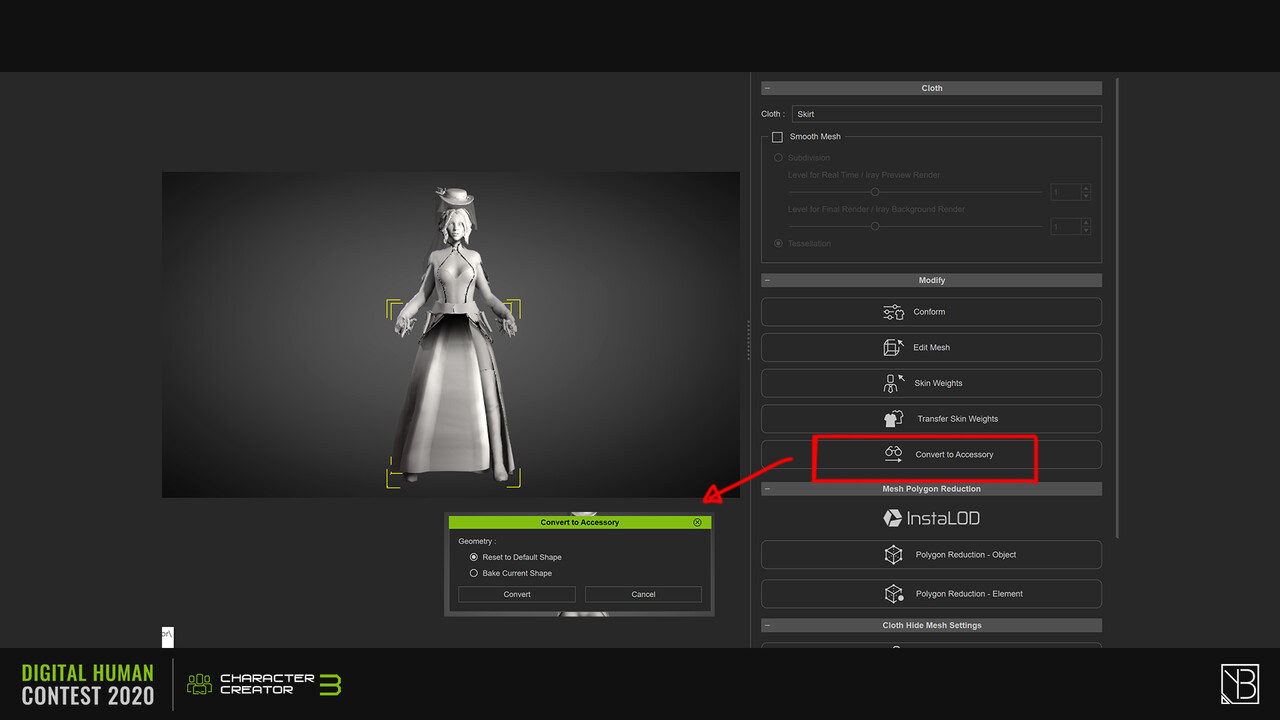
When I tried to re-import the meshes from Zbrush to CC, all my clothing and the rig were broken. I guess it's because I initially imported the base body mesh from CC to Zbrush with the default A pose. Unfortunately, I think that default A pose makes it difficult for me to sculpt and/or simulate clothing on it. The arms are too straight. The legs and finger are too close to each other. So, I applied UE4_A_pose that you can find in CC's content library.
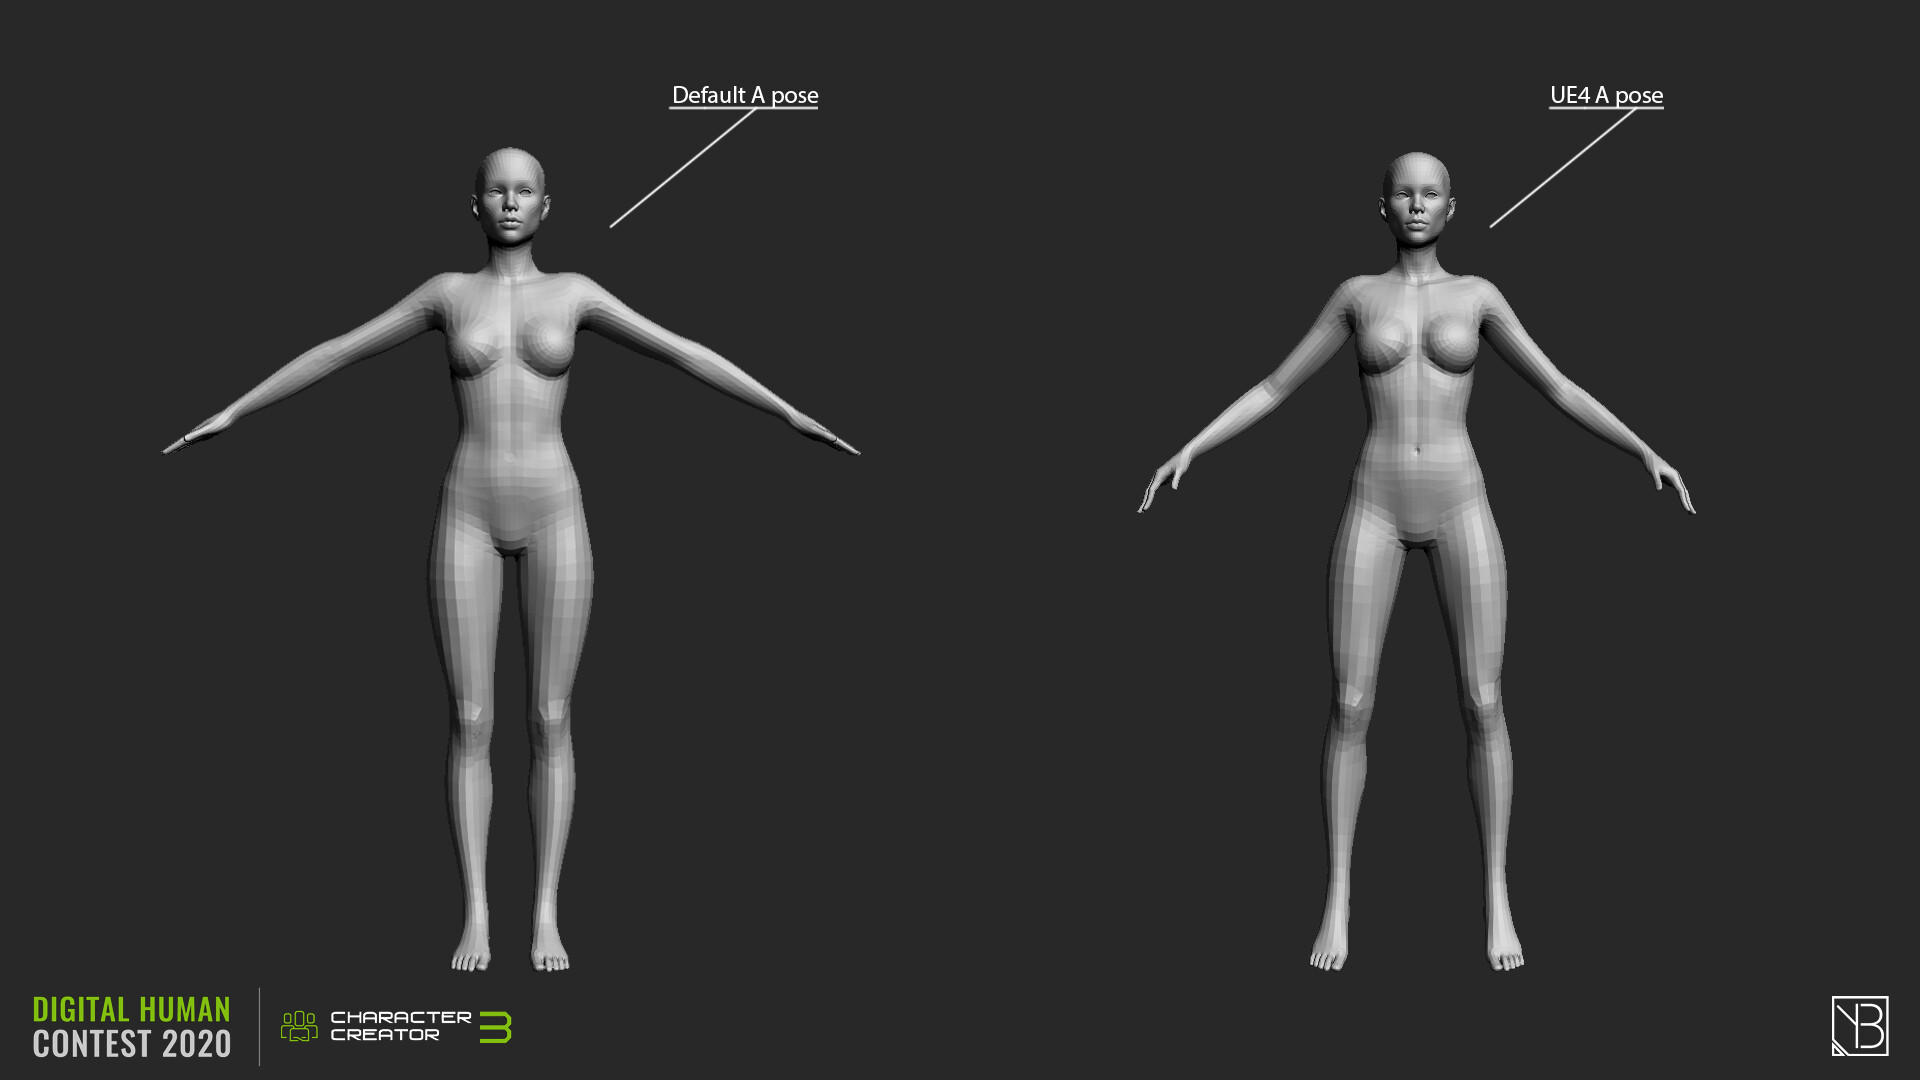
First thing first, if you want to GoZ another pose, you should probably use Layers in Zbrush. So, if you want to make any changes to the face and body later, you can always set back the default A_pose to re-import your character without breaking the rig.
Second fix, if you see the clothing meshes are broken for any reason, you might fix them by pressing - Convert to Accessories. Then you'll get option window - Reset to Default Shape. After that, you can re-Transfer the skin weights again.

Conclusion
Looks like there are so much more things to explore and I'm excited to play around after finishing the modeling and texturing stages. My next goals would be, to work further on my characters face and clothing. Then apply the xyz textures and use substance painter for texturing the clothes etc.
iClone animation test:
2020 CC Digital Human Contest - Black Arachne
Work In Progress / 13 October 2020
Hope you guys doing well! I'm participating a new challenge - 2020 CC Digital Human Contest. This is my work in progress. Never worked with this particular pipeline and I'm excited to try out a new workflow. Decided to give it a shot.
Description:
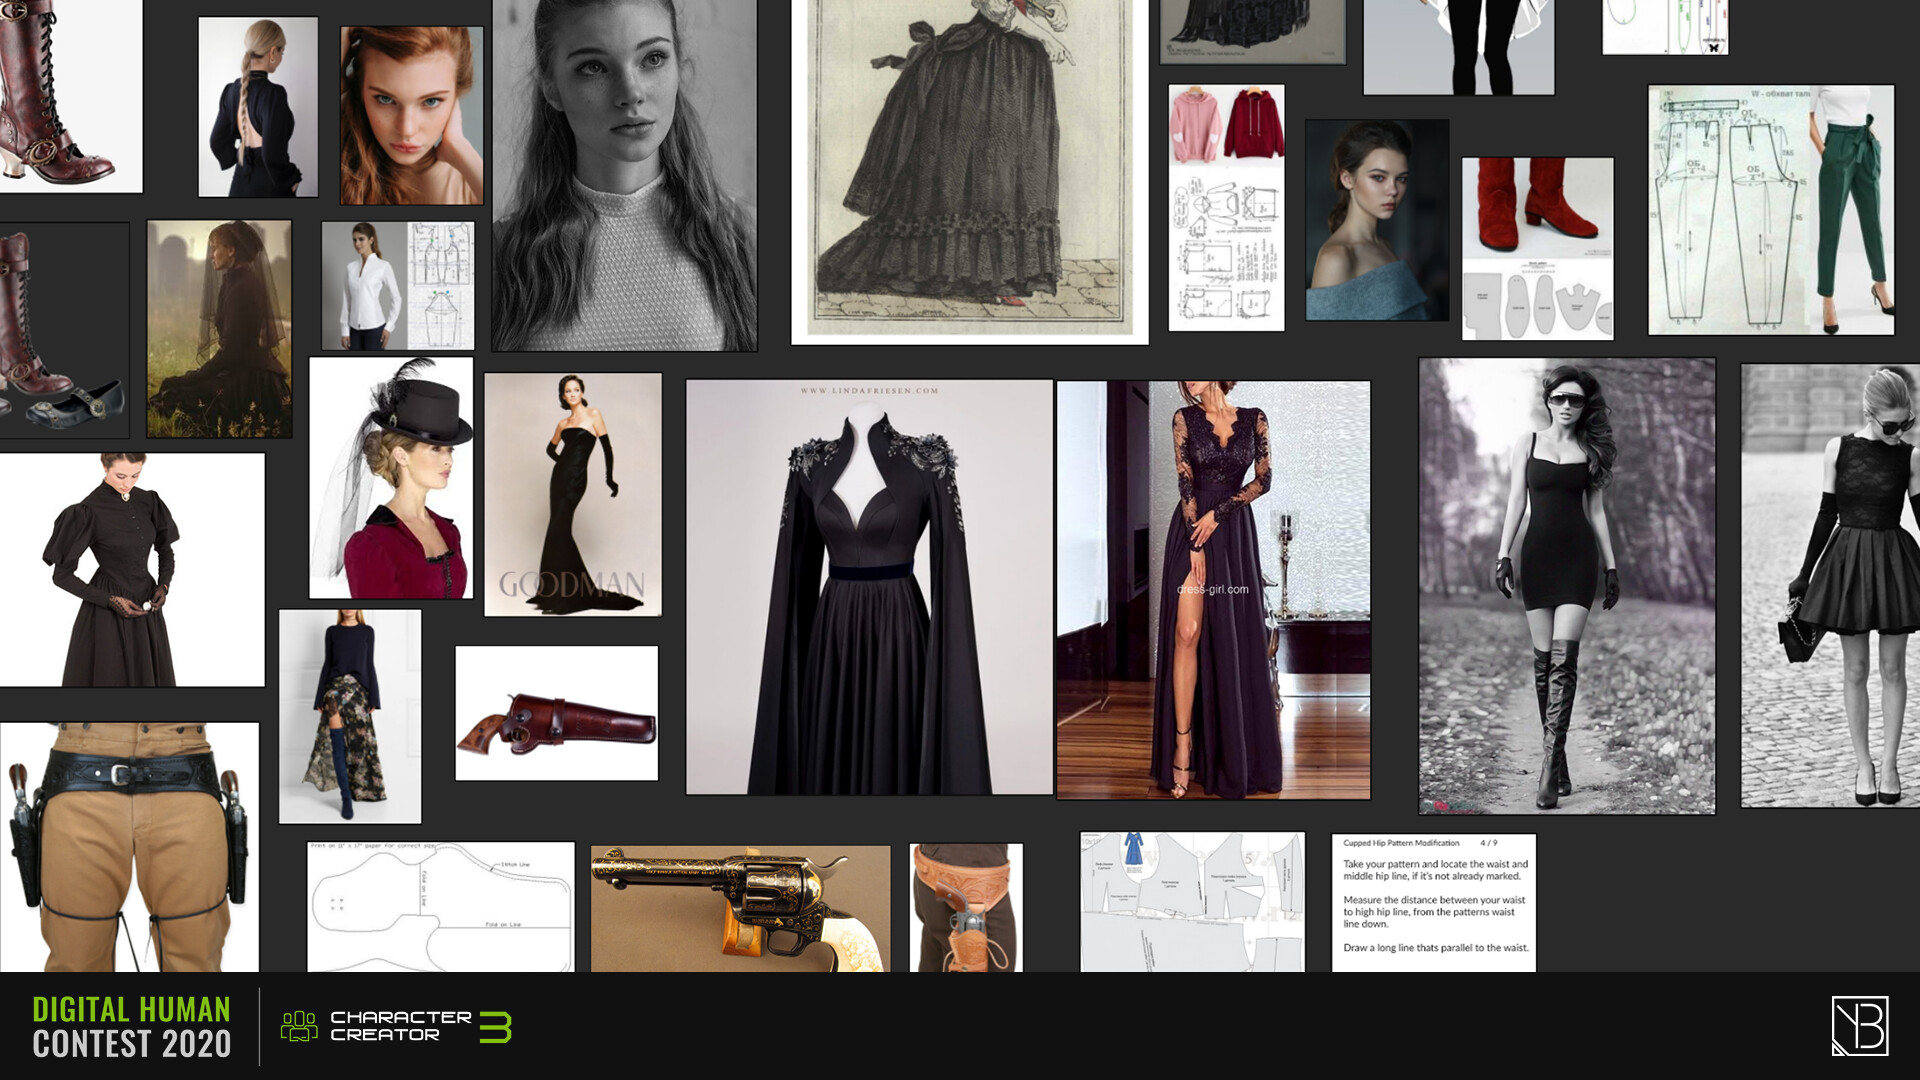
People call her - Black Arachne. She is a legendary huntress. Successfully liquidated the most challenging and secure targets. Some say, her mourning dress and a tender smile shows her enemy's, she still remembers everything. But who knows? Her true intentions remain hidden...
- Key features:
Elegant Black mourning dress
Dual revolvers

Hilde (WIP)
Work In Progress / 01 June 2018
Continuing with detailing everything.
Not sure about fur planes in combination with her hair though. Let know what you think. :)

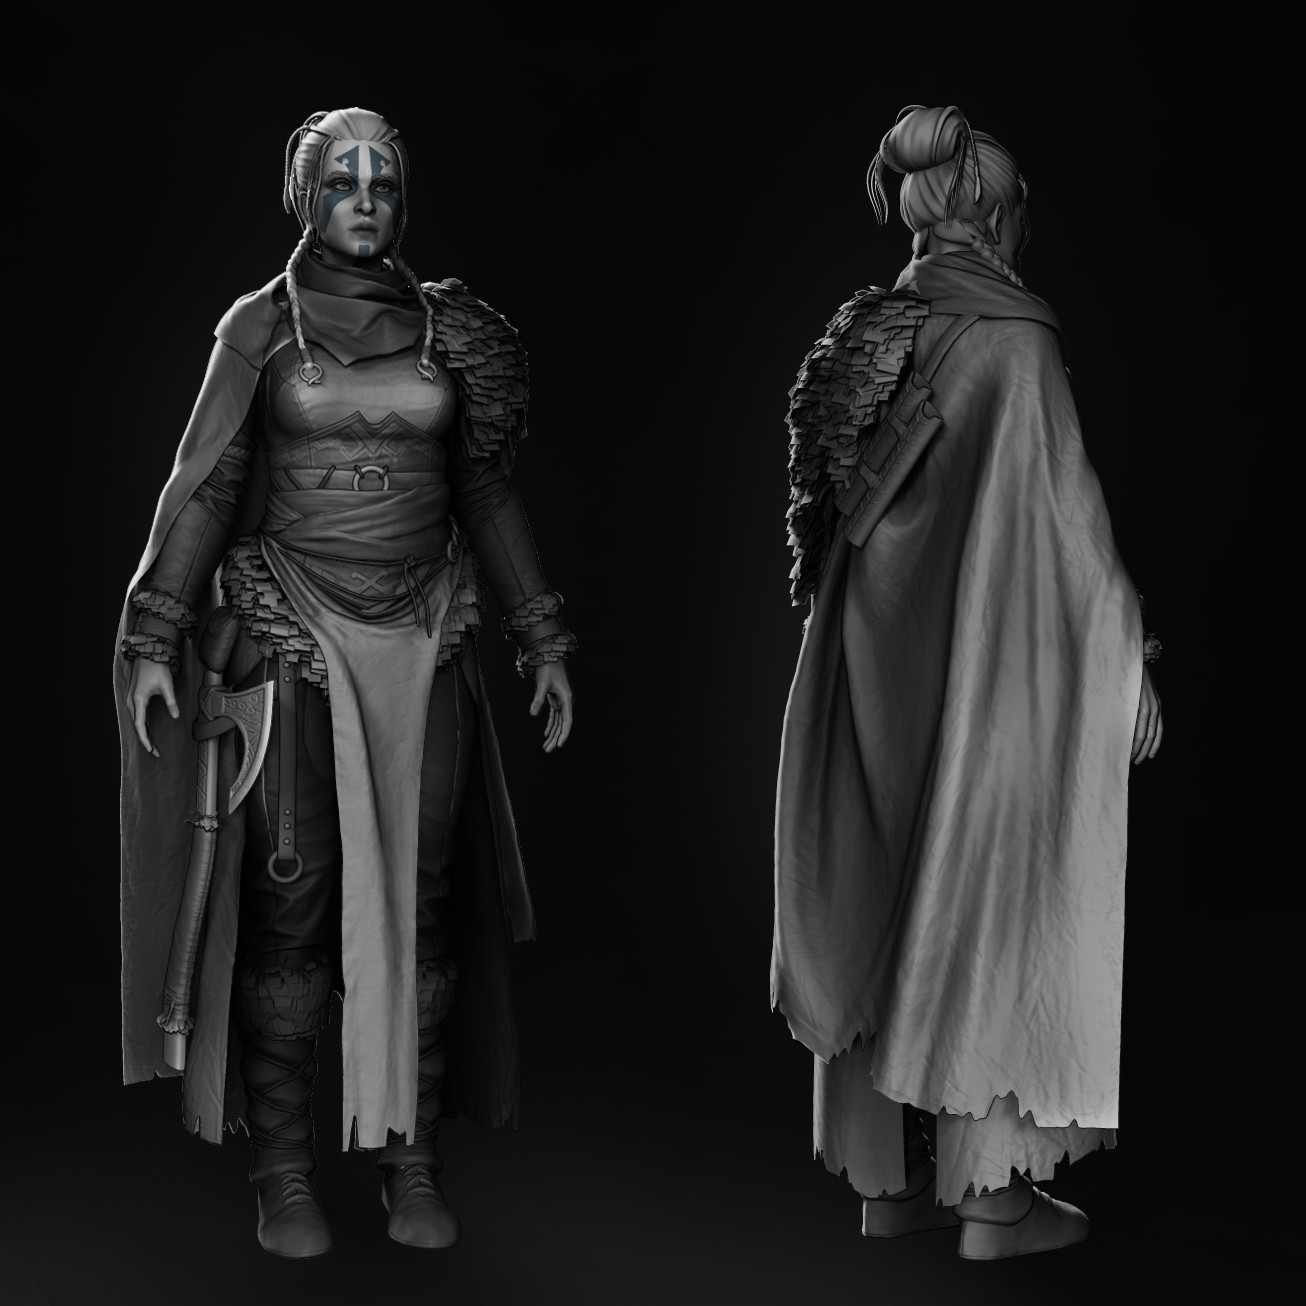

Quick base model made with Zbrush and Marvelous Designer


Personal study in progress.
Based on the concept art of Lena Astron.